In Memoriam: Tai'lahr
OpenUru.org, along with the rest of the Mystonline community, is mourning the loss of Tai'lahr on October 16th, 2019.
Rest in Peace, friend.
Avatar Swimming
This tutorial assumes that you have set up 3DS Max with the Cyan Plugin and have set up an Age file already. If you have not, please go back to the other tutorials and do this.
This tutorial also assumes that you know how to create some basic shapes and textures.
Getting Started.....
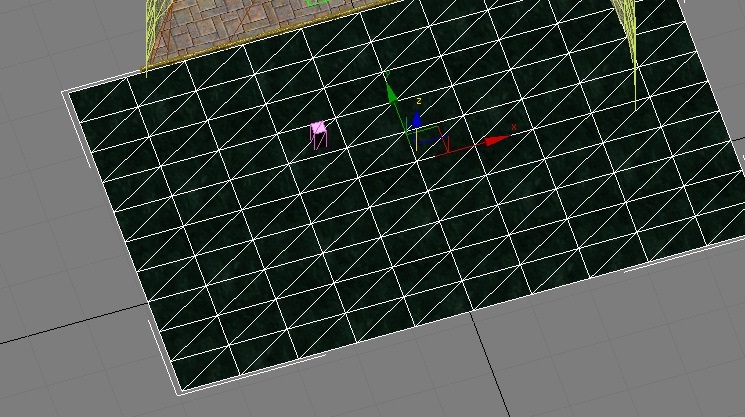
Okay, we're going to need a basic plane for the Avatar to swim in. Your mesh can have a different shape (IE round, oval, etc) as long as it's still a plane.
Create the plane, put it where you need it. Give it some material and a texture (note: the swim area is a drawable....if for some some reason you do not want the swim plane to be a drawable, use the Component Manager and go New>Ignore>NoShow and attach it to the swim plane.).
In my example below, I've just quickly thrown in a plane and gave it a material and texture:
http://assets.openuru.org/wiki/andy/MaxTutPics1/swmmax1.jpg
Make sure you add it to your PageInfo (can't stress this enough):
http://assets.openuru.org/wiki/andy/MaxTutPics1/maxshad6.jpg
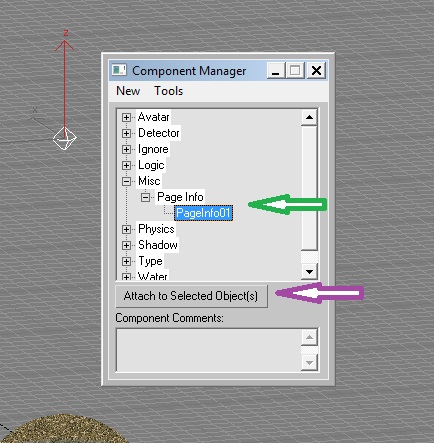
Now, while you are still in the Component Manager and still have your swimplane selected, click on New, then on Navigables, and then 2DSwim.
http://assets.openuru.org/wiki/andy/MaxTutPics1/swmmax2.jpg
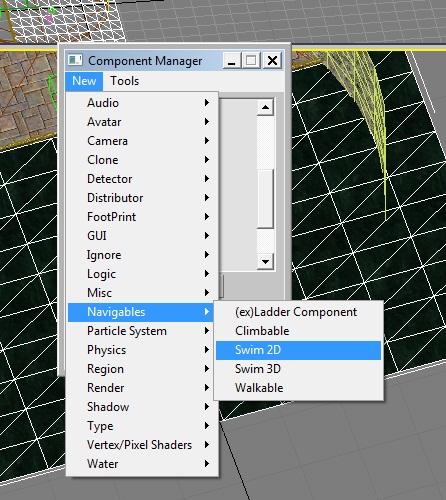
Then attach it:
http://assets.openuru.org/wiki/andy/MaxTutPics1/swmmax3.jpg
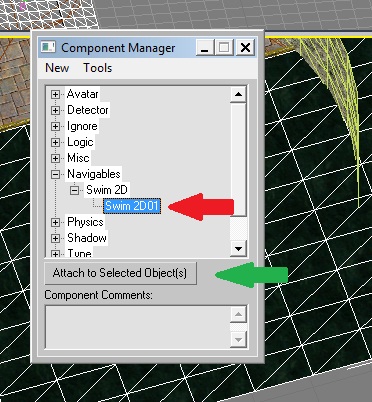
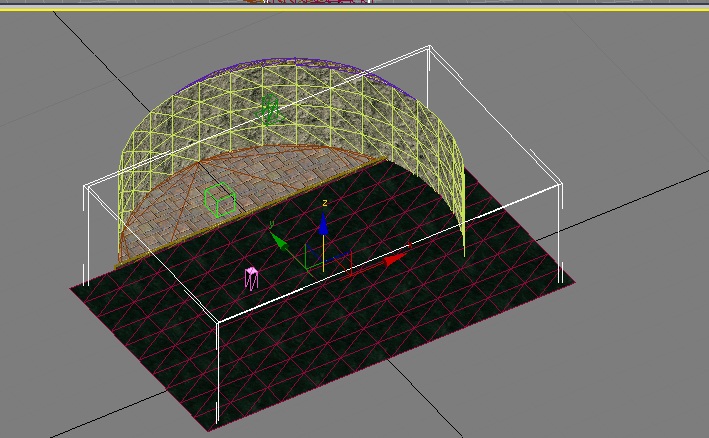
Now, you need to make a box or area that encompasses where the Avatar is going to swim. This will be our Swim Region.
http://assets.openuru.org/wiki/andy/MaxTutPics1/swmmax5.jpg
Once you have made the box or area, again, don't forget to add it to your PageInfo....
http://assets.openuru.org/wiki/andy/MaxTutPics1/maxshad6.jpg
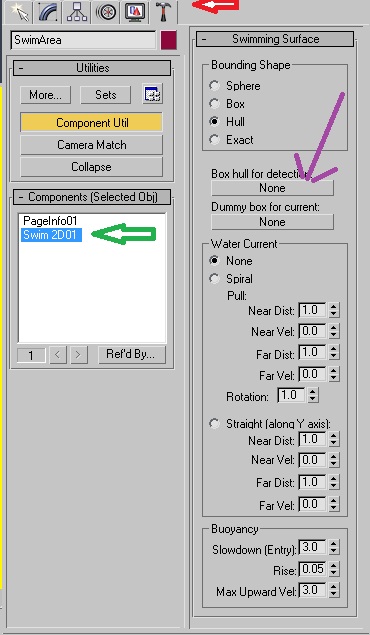
Now go back and reselect your Swim Plane. In your Tools, select on Utils (the little hammer) and select Swim2D01. You'll see a button that says above it: "Box Hull For Detection" and the button itself says "None"
http://assets.openuru.org/wiki/andy/MaxTutPics1/swmmax4.jpg
Click on the button. Then go to one of your 3D windows and click on the Box we made as our Swim Region.
http://assets.openuru.org/wiki/andy/MaxTutPics1/swmmax5.jpg
Now if you look back over at Utils, you'll see that the button no longer says "None" but instead has the name of our Swim Region.
http://assets.openuru.org/wiki/andy/MaxTutPics1/swmmax6.jpg
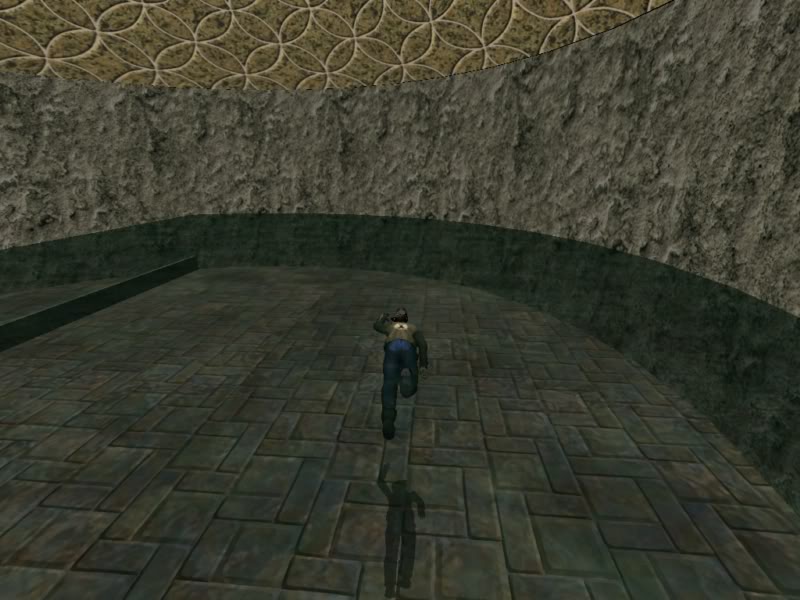
Now, you can stop here and export, and your avatar should swim just fine:
http://assets.openuru.org/wiki/andy/MaxTutPics1/KIimage0068.jpg
Having Currents....
If you want to have currents too, you'll need to do some extra stuff.
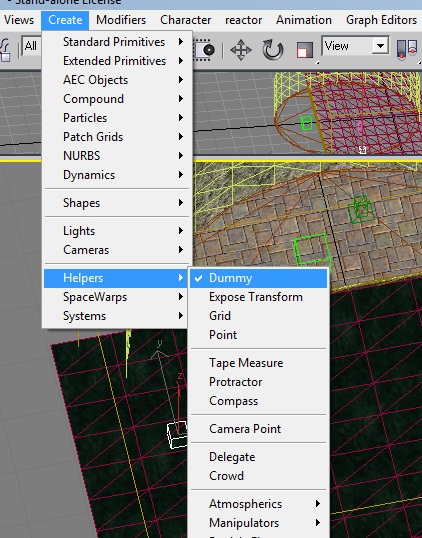
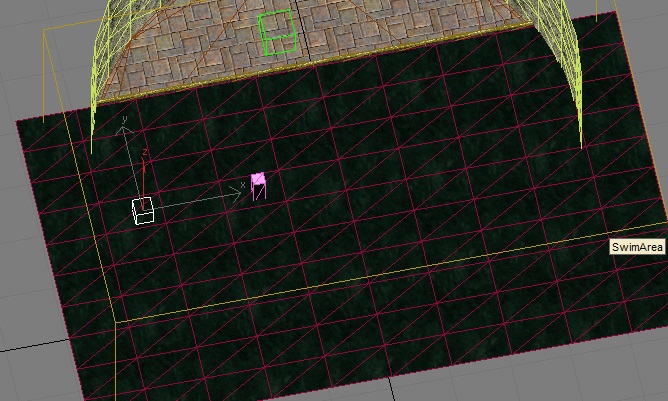
You'll need to create a "Dummy", this will be the reference point for your current. To create a dummy, go up to your menu and click on "Create" then "Helpers" and them "Dummy"
http://assets.openuru.org/wiki/andy/MaxTutPics1/swmmax7.jpg
Click and drag to create the Dummy, rename it something like SwimDummy
http://assets.openuru.org/wiki/andy/MaxTutPics1/swmmax8.jpg
Position the Dummy keeping in mind the following:
The "Y" axis of the dummy will be the direction of the current.
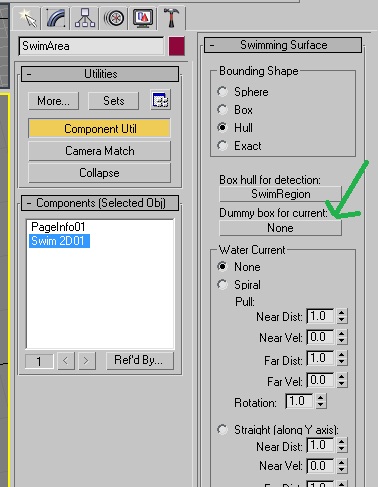
Once you have the Dummy where you need it, go back and select the Swim Plane again, and go over to Utils, selecting the Swim2D01 again. This time, look at the button under "Dummy Box For Current"
http://assets.openuru.org/wiki/andy/MaxTutPics1/swmmax9.jpg
Click on the button, and then click on your Swim Dummy you put in. The button should change to the name of your Swim Dummy.
Now you can play with the current options that you've seen here.
Export and have fun.
Hope this helped.
Return To: 3DS Max Plugin Tutorials
A copy of the license is included in the section entitled "GNU Free Documentation License".