In Memoriam: Tai'lahr
OpenUru.org, along with the rest of the Mystonline community, is mourning the loss of Tai'lahr on October 16th, 2019.
Rest in Peace, friend.
Foot Prints and Ripples
This is one of the easiest things to do in creating your Age and should not take much time at all.
We'll talk about making footprints (like we see in Minkata), Puddles and Ripples (like we see when you splash through some water) in this tutorial.
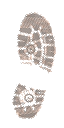
First, for Footprints, you're going to need a footprint texture. Here is one that's from the GoW Wiki that you can use:
This is one of the easiest things to do in creating your Age and should not take much time at all.
We'll talk about making footprints (like we see in Minkata), Puddles and Ripples (like we see when you splash through some water) in this tutorial.
First, for Footprints, you're going to need a footprint texture. Here is one that's from the GoW Wiki that you can use:
http://assets.openuru.org/wiki/andy/MaxTutPics1/footprint.png
Just right click on the image and use "Save link as" to save it to a spot on your computer.
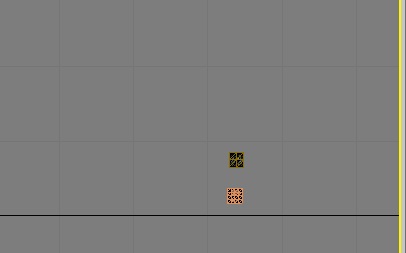
Now, to make footprints, you need to have a mesh already set up and textured that you want the foot prints on. Once you have done that, you then need to go somewhere "outside" your Age (a place in the scene where the avatar will not normally be able to get to) and create a small plane (like 2 x 2 units). This is so we can get the material for the footprints into the Age.
I've got 2 planes here, one for the footprints, the other is for the ripples I'll talk about later on.
http://assets.openuru.org/wiki/andy/MaxTutPics1/footmax1.jpg
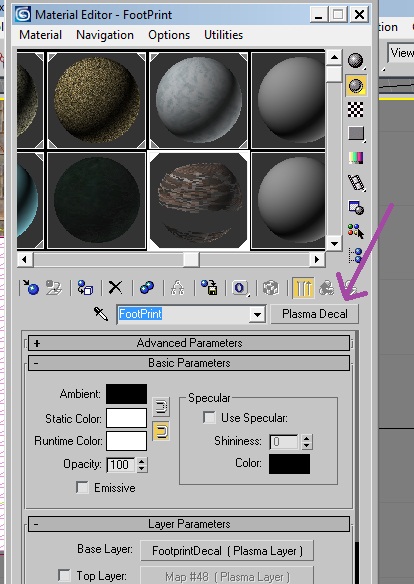
Once you have made the plane, we need to make the material. Open up your Material Editor by hitting your "M" key, and select a grey sphere that you have not used yet.
Note: if you have not already been doing so, I HIGHLY recommend that you rename your material other than "Default - xx". The same goes for your Plasma Maps. The reason why will become clear in a little bit......
Once you have done that, click on the Standard button, only this time, do NOT select Plasma Standard from the box that pops up. Instead, select "Plasma Decal". Then go down
http://assets.openuru.org/wiki/andy/MaxTutPics1/footmax2.jpg
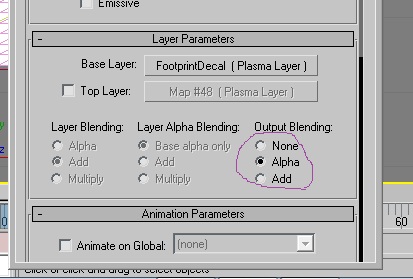
Then go down under Layer Parameters and click on the button next to Base Layer. Select your footprint texture.
Now go back to the Material under Layer Parameters and make sure you have "Alpha" selected:
http://assets.openuru.org/wiki/andy/MaxTutPics1/footmax3.jpg
Assign the material to the plane by click, drag and drop on it, or click on the Assign To Selected button.
Last, don't forget to open up the Component Manager and add this plane to your PageInfo. Once you've done that, your done with this plane.
Now go back and select the mesh that the foot prints will be appearing on. Open up the Component Manager, and click on New >Footprint > Foot Print:
http://assets.openuru.org/wiki/andy/MaxTutPics1/footmax4.jpg
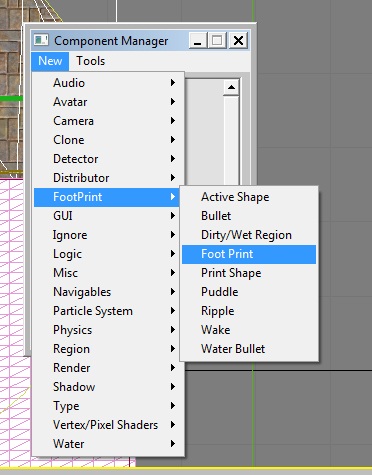
And then attach it to your mesh.
Now go over to your Utils Tab (the little hammer) and click on Component Utils and select the footprints.
http://assets.openuru.org/wiki/andy/MaxTutPics1/footmax5.jpg
Where I have my purple arrow, you need to click here and assign the decal we made. When you click here, the Material/Map Browser will open up:
http://assets.openuru.org/wiki/andy/MaxTutPics1/footmax6.jpg
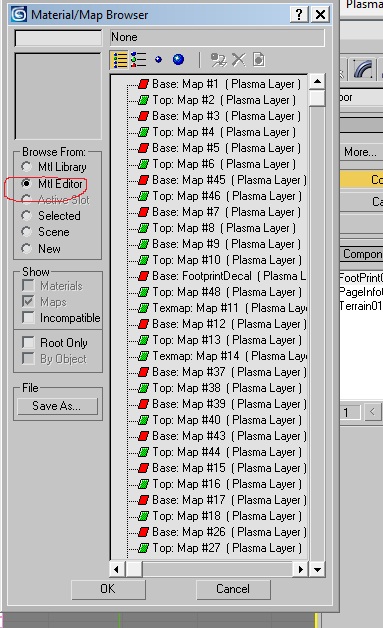
First, in the Browse From box, click on Mtl Editor (where I've circled in red). This will display all the materials we've made for our Age so far.
As you can see.....having everything named by the default names is NOT a good idea.....it can be hard to find stuff, and if you don't remember what the Map# is, you'll have to go back and find out. Select the map that is our decal texture. Can you see mine? It says Base: FootPrintDecal........ kind of hard to see, when everything is named by it's default name....
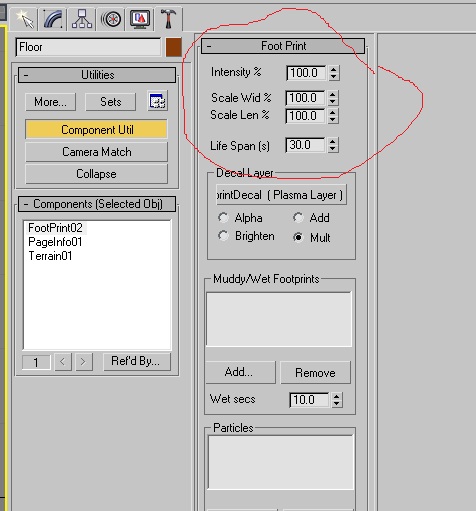
When you've selected your decal, we go back to the Utils Tab. Take a look:
http://assets.openuru.org/wiki/andy/MaxTutPics1/footmax7.jpg
In the Decal Layer box, you have "Alpha", "Add", "Brighten" and "Mult". For footsteps on land, I recommend using "Mult" (multiply), as it will make your foot prints appear dark. If you use "Add" or "Brighten" they'll look bright.
Now look where I've circled. Intensity has a big effect on how the prints appear. 100% is pretty good for foot prints on land. If you make this number lower, the more and more transparent the prints become.
"Life Span(s)" is how long the prints will stick around in seconds. In this pic, the number 30 means any footprints will stay in view for up to 30 seconds, then they'll go away.
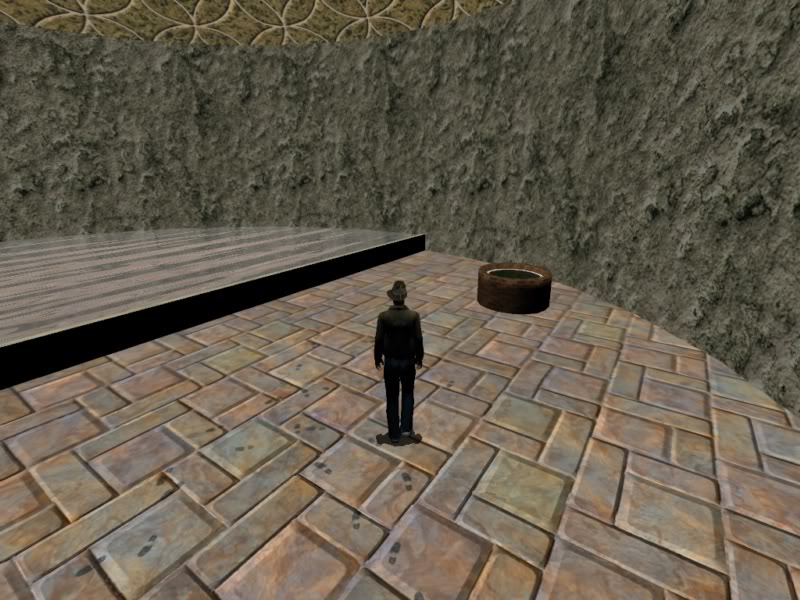
That's all you need to do. Now export your Age, Drizzle it, start Uru and check your prints out:
http://assets.openuru.org/wiki/andy/MaxTutPics1/KIimage0083.jpg
Water Splashes and Ripples
Puddles and Ripples are what we use when you have your avatar splashing through water, both simple textured water puddles and larger wavesets.
According to the Cyan documentation with the plug in, "Puddles" is set for about ankle level on the avatar. So if you have a shallow puddle about that high, you'd use "Puddles".
If your water is a bit deeper (or you have your avatar swimming), you'll want to use "Ripples".
To set this up, you'll need to follow the steps in the Foot Print part of this tutorial for making a decal (only you'll use a "ripple" type of decal instead of a actual footprint) I don't have one I can share right now, and will post one when I can). Once you have your decal plane for either Puddles or Ripples, you then select your water mesh.
I'm going to show you for Ripples as my water was knee deep, however, for Puddles, you'd do the same thing, just select Puddles in the Component Manager.
So open up the Component Manager and click on New > Footprint > Ripple:
http://assets.openuru.org/wiki/andy/MaxTutPics1/footmax8.jpg
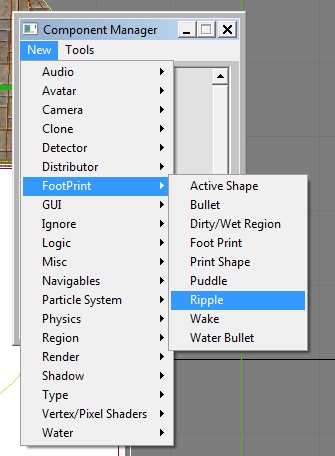
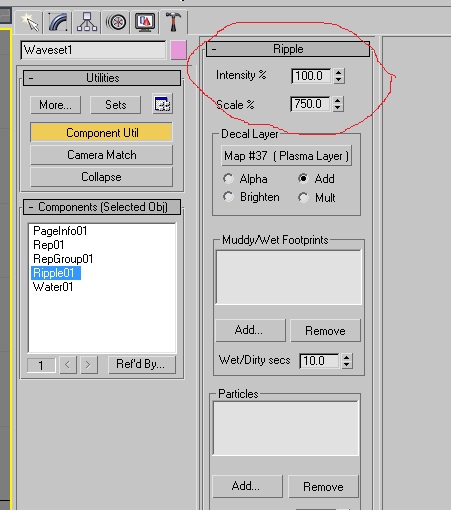
Attach it to your water mesh. Then go to the Utils tab, and click on the Component Utils button. Select our Ripple:
http://assets.openuru.org/wiki/andy/MaxTutPics1/footmax9.jpg
Again, here you would follow the same steps as in the Footsteps part, and select your decal in the "Decal Layer" box. Only for Ripples (or Puddles) you'll want to use either "Add" or "Brighten" (I've found that Alpha makes them not show up, and Mult will make them look dark).
In the Intensity Box, I have it set to 100%. The Scale Box, you'll notice that I have it at 750%. The Scale box will go up to 10,000% if you want. I've found that 100% looks very small. You can play with these numbers.
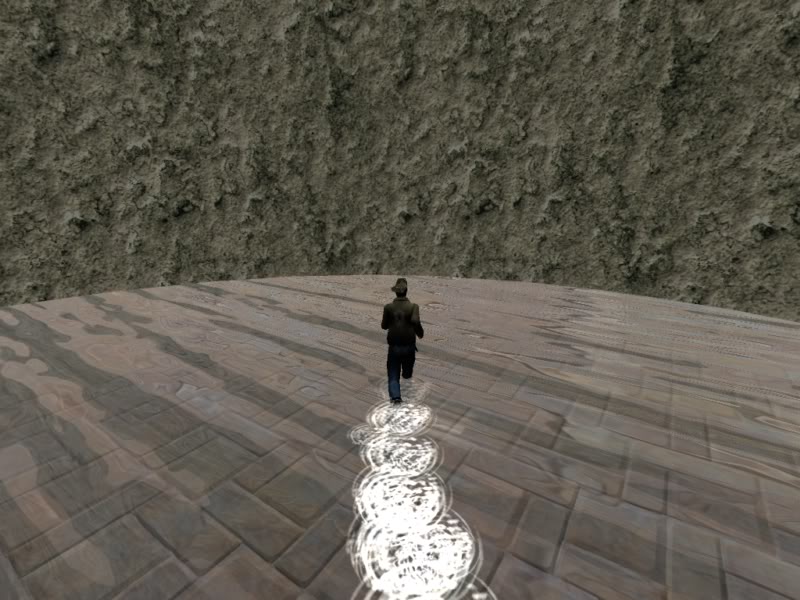
Once you've done that, you're done, you can export, Drizzle it, and link in and enjoy your ripples (or puddles):
http://assets.openuru.org/wiki/andy/MaxTutPics1/KIimage0081.jpg
Return To: 3DS Max Plugin Tutorials
A copy of the license is included in the section entitled "GNU Free Documentation License".