In Memoriam: Tai'lahr
OpenUru.org, along with the rest of the Mystonline community, is mourning the loss of Tai'lahr on October 16th, 2019.
Rest in Peace, friend.
Making Stencils
Credit for this Tutorial goes to Boblishman who figured it out how to do this.
As you may know, we use stencils in real life to do things like paint a word or pattern on to a surface, but so we don't cover that entire surface.
We can do the same thing with our textures when making Ages for Uru.
There are many uses for stencils: you can use them to "paint" a dirt path through some grass, you can use them to put moss or grime on a stone, and you can use them to make parts of an object reflective or shiney, but not all of it.
The example I'm going to walk you through here, is how to make part of something reflective or shiney, and leave the rest of it not. Using stencils for just regular textures is close to the same, but their are differences, and I'll talk about those differences at the end. But for now, most of how you do this is the same.
Get Or Make Your Stencil
If you already have the stencil that you want to use made, then you can jump down to the 3DS Max part of this tutorial. If not, I'll show you how I've made mine.
I use 2 programs to make textures and edit them. Genetica is the program I use to create the texture, and GIMP is the Open Source photo shop program I use to edit the textures.
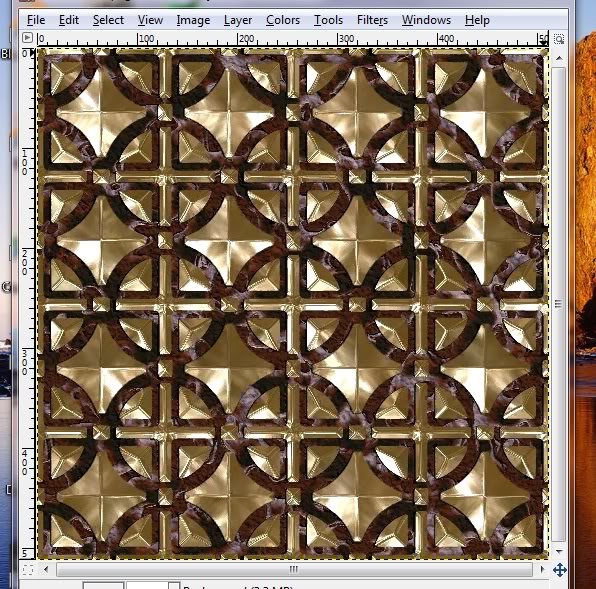
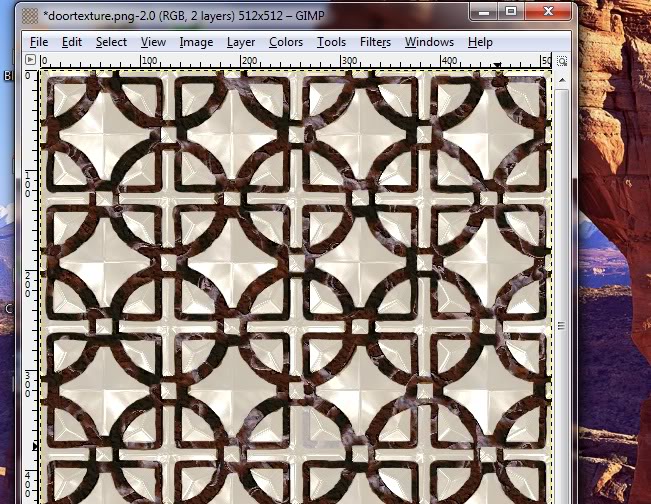
In the pic below is a texture I have from Genetica. It's the texture I'm using on my doors in Neolbah. The texture itself looks pretty interesting, but I want to have the dark purple part be reflective or shiny, like we see on the classroom doors in the Hood.
http://assets.openuru.org/wiki/andy/MaxTutPics1/stenciltut1.jpg
This texture is a .png and has an Alpha or Transparency channel to it.
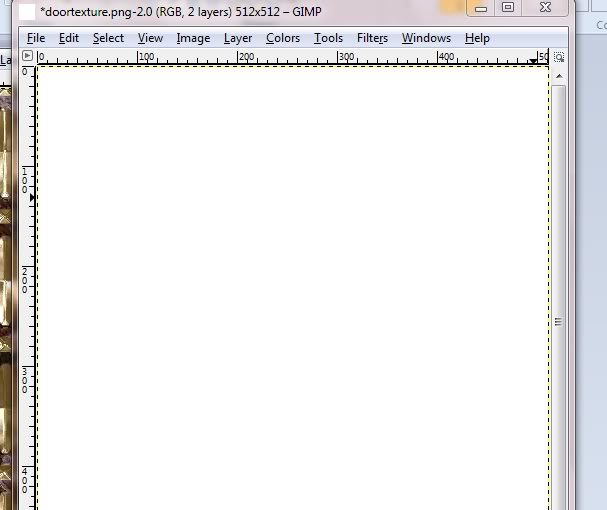
The first thing I do is make a new Layer for the pic, and I want it all white:
http://assets.openuru.org/wiki/andy/MaxTutPics1/stenciltut2.jpg
So there I've made it, and my texture now looks all white:
http://assets.openuru.org/wiki/andy/MaxTutPics1/stenciltut3.jpg
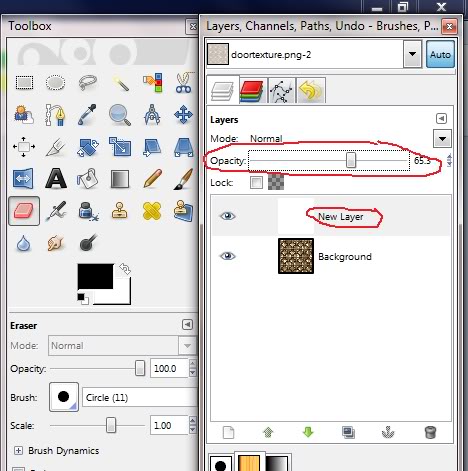
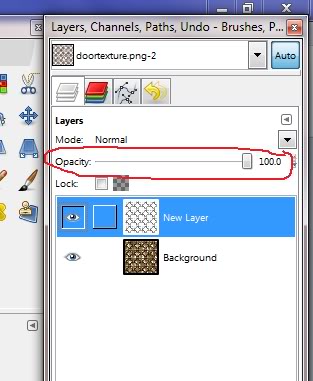
Now what I want to do, is ERASE the white in this layer where those purple grooves are. But, I can't see the grooves, so I now lower the opacity of the white layer:
http://assets.openuru.org/wiki/andy/MaxTutPics1/stenciltut4.jpg
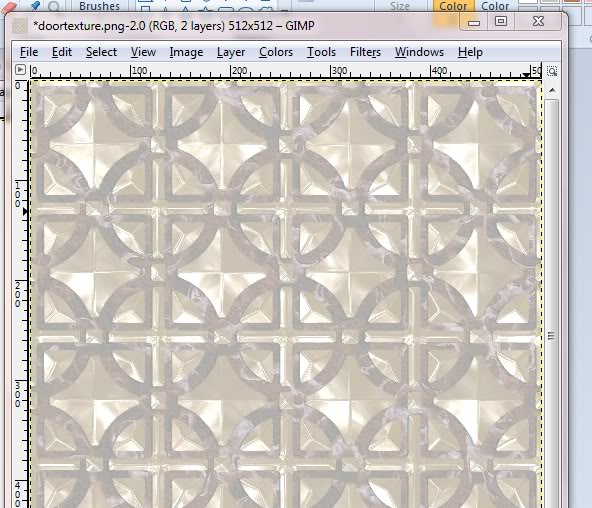
I lowered it just enough to see the purple groves, but not too much so I can't tell what I've erased:
http://assets.openuru.org/wiki/andy/MaxTutPics1/stenciltut5.jpg
Now, while still on this layer, I get the eraser tool out, set it to the right size, and begin erasing the white layer where the purple grooves are:
http://assets.openuru.org/wiki/andy/MaxTutPics1/stenciltut6.jpg
This can be a very long and tedious process, but is well worth it in the end:
http://assets.openuru.org/wiki/andy/MaxTutPics1/stenciltut7.jpg
Now that I'm done erasing where I need to, I can raise the Opacity of the white layer back to 100%
http://assets.openuru.org/wiki/andy/MaxTutPics1/stenciltut8.jpg
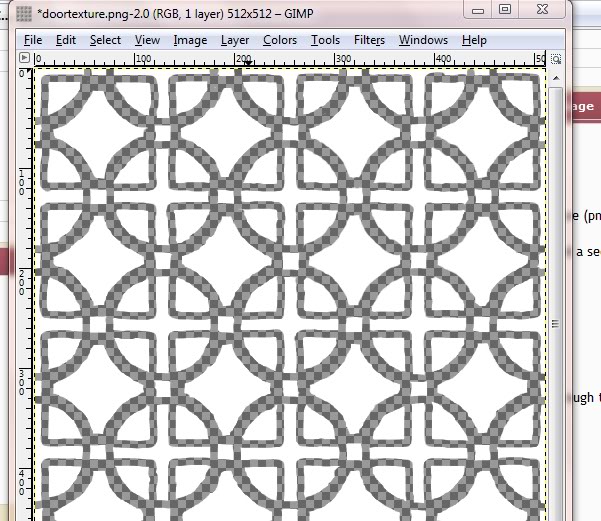
Now I select the original texture layer, and then delete it, leaving only the white layer:
http://assets.openuru.org/wiki/andy/MaxTutPics1/stenciltut10.jpg
As you can see, my white layer has these transparent grooves. These same grooves are where my texture will end up looking shiney and reflective in Uru.
Last, save your stencil, but BE CAREFUL!!! Don't just click on "Save" or you will over write your original texture. Save this one with the word "Stencil" in the name, and make sure you save it in a format that supports Alpha channels (.png, .tga, .dds, etc)
Okay, you're done here. Time to go to 3DS Max!
3DS Max....
Load up your scene and select your object that you're going to apply your stencil to.
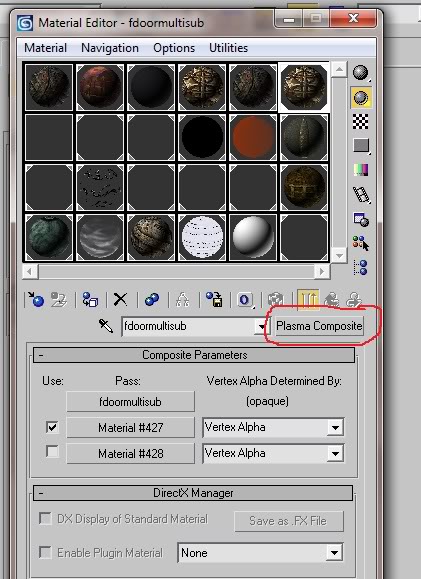
Open up the Material Editor, select a slot and then create a NEW Material. Make it "Plasma Composite" NOT STANDARD!!!
http://assets.openuru.org/wiki/andy/MaxTutPics1/stenciltut11.jpg
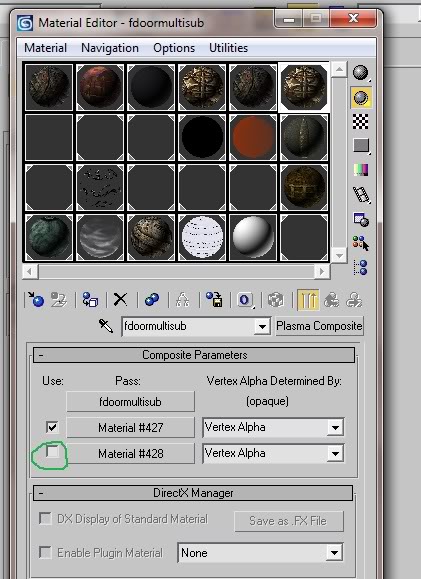
In Plasma Composite you have what is called 3 "passes", or you can think of them as 3 submaterials. For our stencil, we are only going to use 2 of the passes. So go down and remove the checkmark from the last one:
http://assets.openuru.org/wiki/andy/MaxTutPics1/stenciltut12.jpg
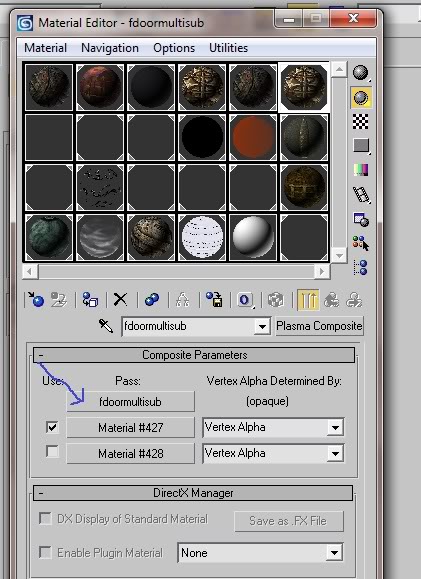
Okay, now let's take care of Pass number one by clicking on the button that my blue arrow points to in the pic below:
http://assets.openuru.org/wiki/andy/MaxTutPics1/stenciltut13.jpg
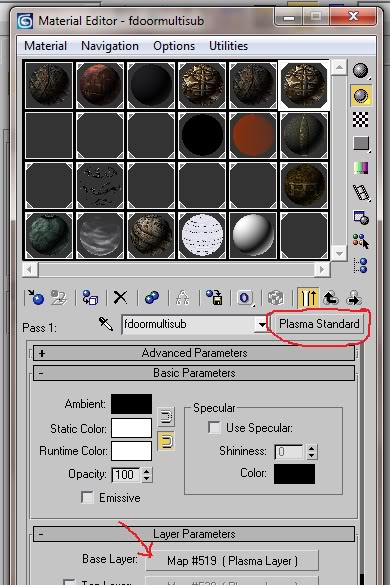
Since this is like a Sub Material, make sure that this one is Plasma Standard. You are going to put one texture here. In my case it will be my original door texture that I started with. Make sure that in the Blending part of the material, you leave it set to "None."
http://assets.openuru.org/wiki/andy/MaxTutPics1/stenciltut14.jpg
Now go back to your main Plasma Composite material, and click on the 2nd button for the 2nd Pass:
http://assets.openuru.org/wiki/andy/MaxTutPics1/stenciltut15.jpg
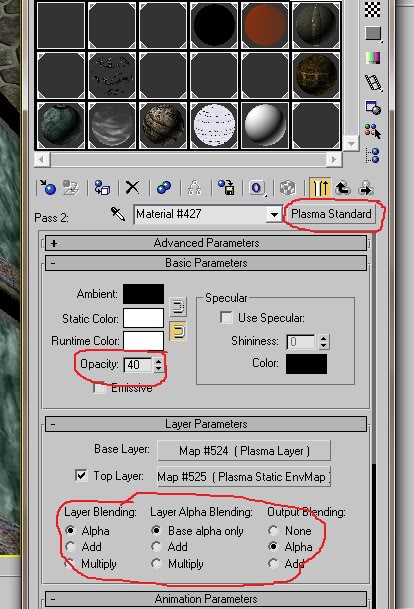
Now you want this one to be Plasma Standard also. You will also be using BOTH layers here, Base and Top. So go ahead and put a checkmark next to the Top Layer.
Set your blending like you see mine in the pic. Now click on the first or Base layer.
http://assets.openuru.org/wiki/andy/MaxTutPics1/stenciltut16.jpg
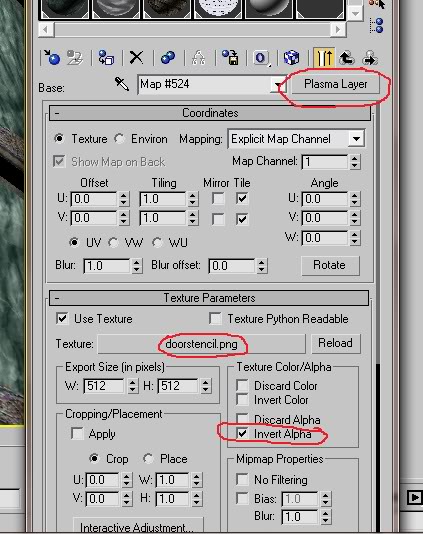
Please take a look at the pic above. This layer is going to be where you use your actual Stencil texture you made. It needs to be a Plasma Layer, and there is one more important thing. Take a look where I've circled "Invert Alpha" in the Texture / Color Alpha box. Notice how I have a checkmark there. You need to put one there too IF you are using your stencil here to help make something partly reflective and shiney. IF you are NOT using your stencil for that, but are instead just combining 2 regular ol' textures DO NOT PUT THE CHECKMARK THERE!
Now that you have the Base Layer (that is your stencil) set up, you need to go to your 2nd or Top layer:
http://assets.openuru.org/wiki/andy/MaxTutPics1/stenciltut17.jpg
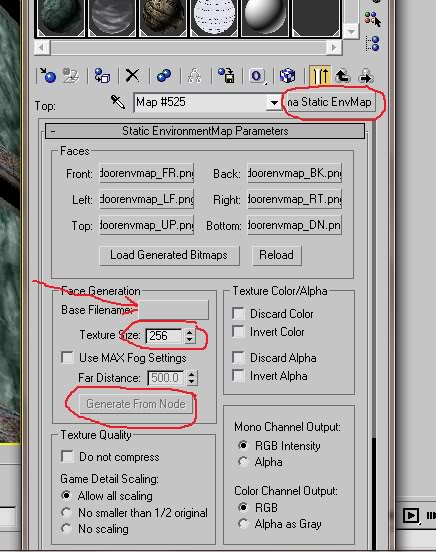
Okay, now what I've done here is changed the layer from Plasma Layer to Plasma Static EnvMap. You could use a Dynamic EnvMap if you want, but for making things like this shiney (small things) it's better to just use a Static EnvMap.
Now you'll notice you have 6 buttons: Front, Top, Bottom, Left and Right. These are the static images of the area around your object that you put in so that when you export your Age from Max, the plugin makes a Cubic Env Map for you.
Now you can either go make your own pictures for this......OR.....you can have Max take the pictures for you.
If you want Max to take the pictures for you, then go down to the box that is labeled "Face Generation". Click on the blank button next to where it says "Base Filename". A new window will open up. In this window, type in the name you want for you EnvMap file to be (I typed in DoorStenEnvMap.png), and then hit enter. It looks like it wants you to pick something, but what you want to do is type in a new file name. Please try to make sure you use either .png or .tga extensions. With .png, a small box will pop up, asking you what properties you want for the .png file. I always just click on Ok and use the default.
Okay, next in the Face Generation box, you'll have a little box for Texture Size. It will be defaulted to 64. This means Max will generate an image that is 64 x 64 pixels. If your object is really small, or you don't care how nice the reflection is going to look, you could leave it here. I always change it to 256 most time, but you can take it up to 512. Just remember that the bigger the number, the larger your texture prp file will end up being, heh!
Now click on the button that says "Generate From Node". The button will go yellow, and Max will wait for you to pic something. You can either left click on your object in the 3D Scene window, or you can hit the "H" key and select it from a list. What will happen next, is Max will generate 6 rendered scenes from the center of the pivot point of your object (you'll actually see them in a box that pops up), and will place them up where those 6 blanks buttons.
OMG! Something Went Horribly Wrong!
Okay, here is where you could run into some problems.
1) It rendered the frames, but each one that I saw was all black!
A few things can cause this: A) you have no lighting in your Age yet, or you are only using Run Time Plasma lighting. Stick some lights in to light up your objects. B) Your object is actually enclosed in something (oops) C) The pivot point for you object is WAAAAAAAAAAAAAAAAAY out in never never land! Reset the pivot point on your object.
2) Okay, I saw pics, but they all looked like they were in the wrong location! Again, your pivot point for you object is far off from your actual object. Reset the pivot point
3) Okay, I saw pics, and they are from the right point, but I don't like what I saw! Try to pick a different Node. Sometimes you may even need to throw in a Dummy point and use it as your Node. Just remember to remove the dummy when you're done.
4) I ordered too much pizza and can't eat it all!
Quickly jump on a a plane, and fly to where I live. I will help get rid of the offending pizza!
Now Back To The Show....
Once you have generated your EnvMap faces, you are done here. Go back to the main 2nd Pass material, and change the Opacity to something less that 100. If you leave it at 100, your reflective part will reflect like a mirror. I set mine to about 40 and it works well.
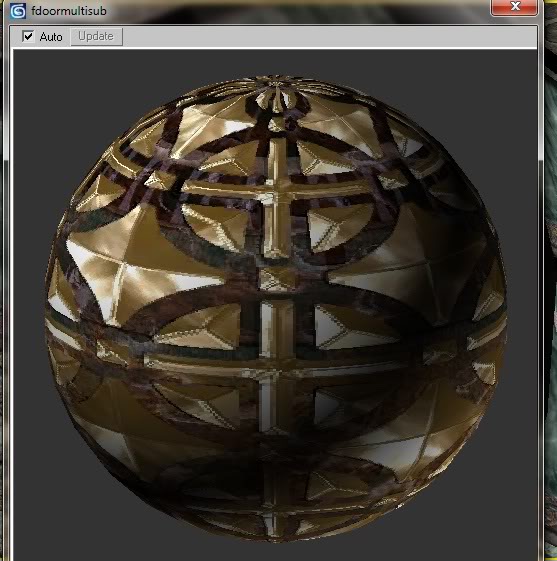
Make sure you assign the Plasma Composite material to your object. If you did it right, you'll see your results in your Active Material window:
http://assets.openuru.org/wiki/andy/MaxTutPics1/stenciltut18.jpg
If you look in the grooves, you can faintly see my EnvMap in them. I'd show you an Uru screen shot, but reflective things like this don't show up well. Now export your Age, convert it, link in and check it out!
But I'm Just Using The Stencil For 2 Regular Textures
You do everything the same as I showed above, except:
You do NOT invert the Alpha on your stencil and: The Top layer of the 2nd Pass will be Plasma Standard with your other texture.
Hope this helped!
Return To: 3DS Max Plugin Tutorials
A copy of the license is included in the section entitled "GNU Free Documentation License".