In Memoriam: Tai'lahr
OpenUru.org, along with the rest of the Mystonline community, is mourning the loss of Tai'lahr on October 16th, 2019.
Rest in Peace, friend.
Using Multi / Sub Materials
Multi / Sub materials is a way to add more than one material to a single object. Specifically, it's great for adding different textures, and UV mapping each on a single object.
Why would you want to do this? Well, it's a lot easier to move around and manipulate a single object in your 3D scene than it is to do many objects at once. It also helps if you need to vertex paint or make light maps for that object.
Using this feature is actually very easy, and I'll take you through it step by step here.
Getting Started......
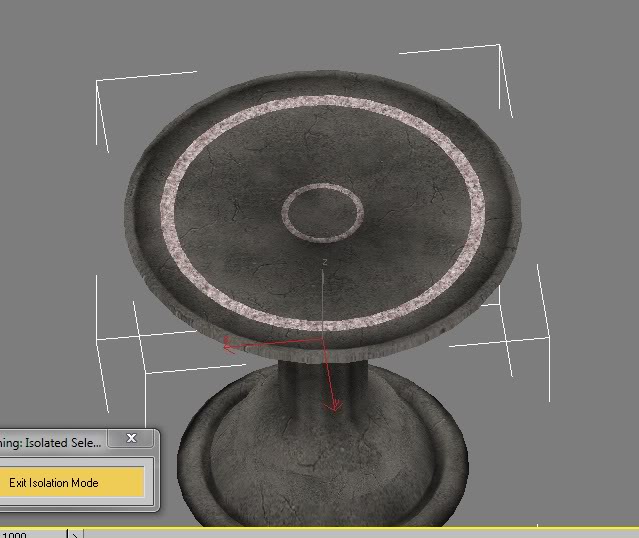
Okay, first you need to build an object that you're going to have more than one material on. It could be a room, or a highly decorative floor, or just about anything really. I'm going to use my pub table here as an example. It only needs 2 materials on it, but I could easily have up to 10 if I wanted.
http://assets.openuru.org/wiki/andy/MaxTutPics1/multisub1.jpg
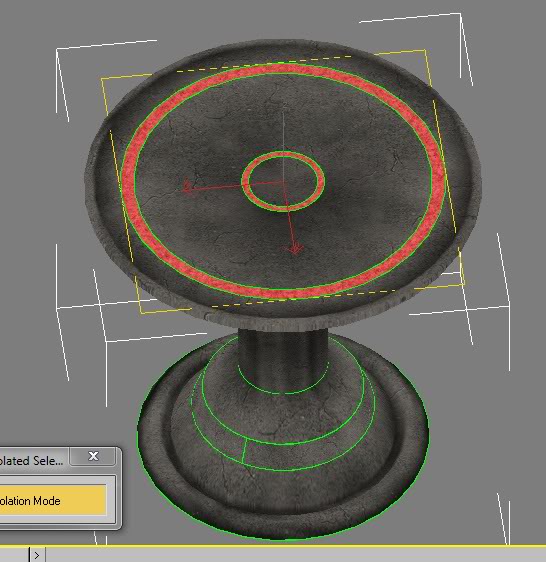
Now the above picture is how I imagine this table would look: stone, but with a couple of granite rings in it.
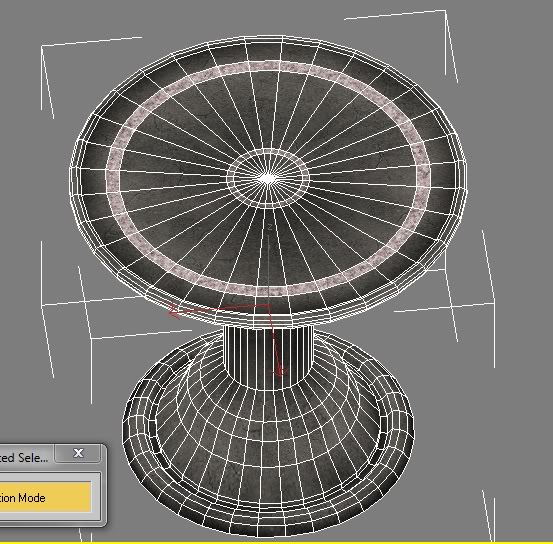
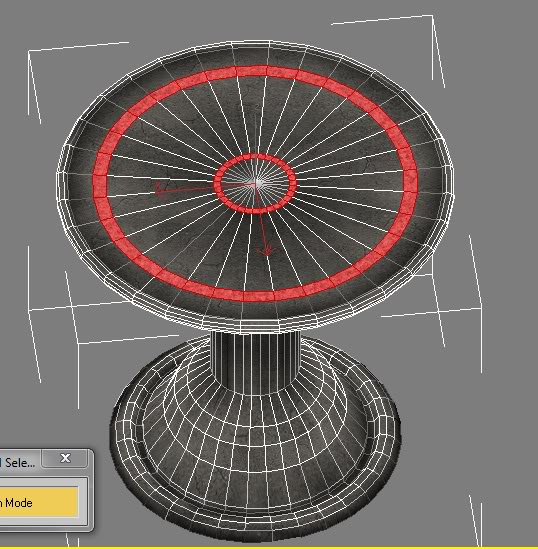
Now I COULD seperate the rings and have them as a separate object, but there is no need for that. Instead, use the F4 key on your keyboard to call up the mesh lines of your object:
http://assets.openuru.org/wiki/andy/MaxTutPics1/multisub2.jpg
Now over in your Modifiers Tab, make sure your object is an "Editable Mesh". Open the tree and select "Polys" (some people like to do Faces, but in Max, that's a lot of triangles. Polys make it faster for me).
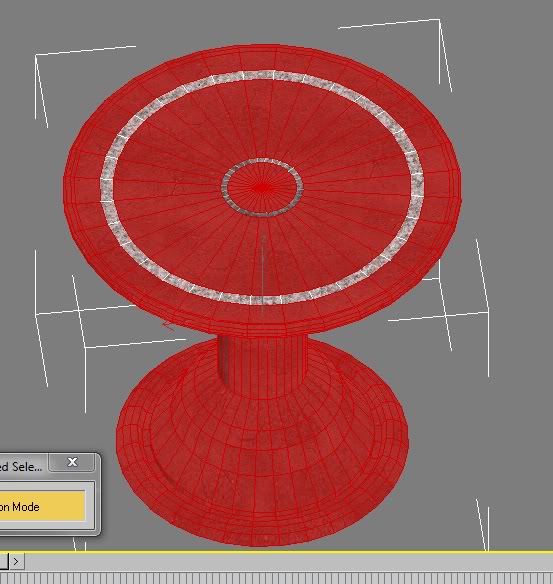
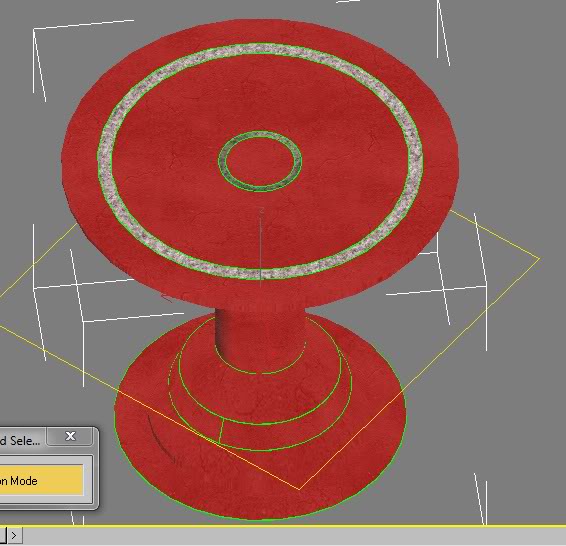
Now go over to your table and select all the faces that are going to have your first material:
http://assets.openuru.org/wiki/andy/MaxTutPics1/multisub4.jpg
Which material should be first? That's totally up to you!
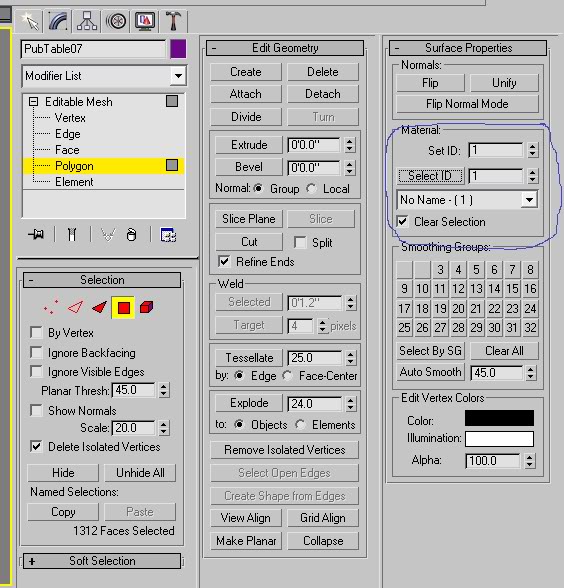
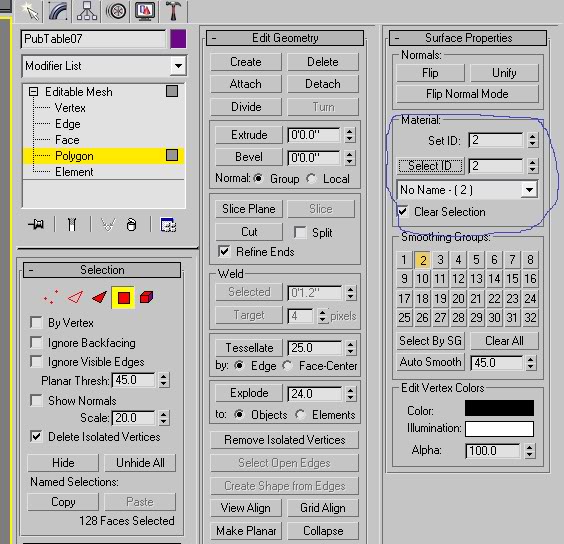
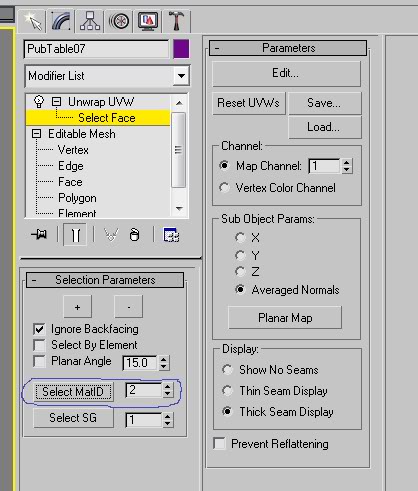
Now go back over to the Modifier Tab and go to the box that says "Materials". Take a look at where it says "Set ID" and the number 1 that is in that box. I'm going to leave it set to number 1. I'm also taking a piece of paper and writting down "Material ID Number 1 will be cracked concrete" because that's the material I want to put on those faces.
http://assets.openuru.org/wiki/andy/MaxTutPics1/multisub5.jpg
Now go back to your 3D scene window and select the polys of another area. In my case, it's the faces that will be the 2 rings that I want to be granite:
http://assets.openuru.org/wiki/andy/MaxTutPics1/multisub6.jpg
Now, again, go back over to your Modifier Tab and look in the Material roll out box. Go to where it says Set ID and change it to the number 2.
http://assets.openuru.org/wiki/andy/MaxTutPics1/multisub7.jpg
Again, on my paper I'll write down: "Material ID number 2 is pink granite" because that's what I want there.
Now you would repeat these steps until you've assigned all the polys on your object their different material ID's.
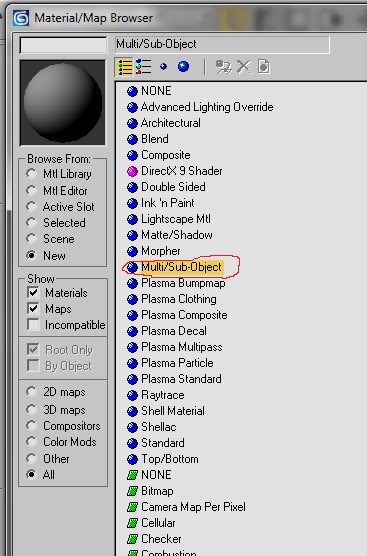
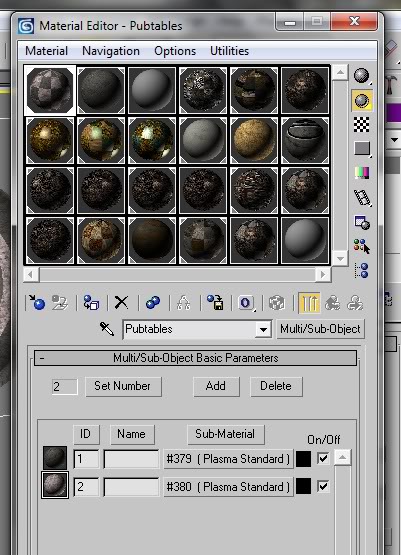
Okay, time to open up the Material Editor. Select a spot and get a new material. But instead of Plasma Standard, select Multi/Sub-Object instead:
http://assets.openuru.org/wiki/andy/MaxTutPics1/multisub8.jpg
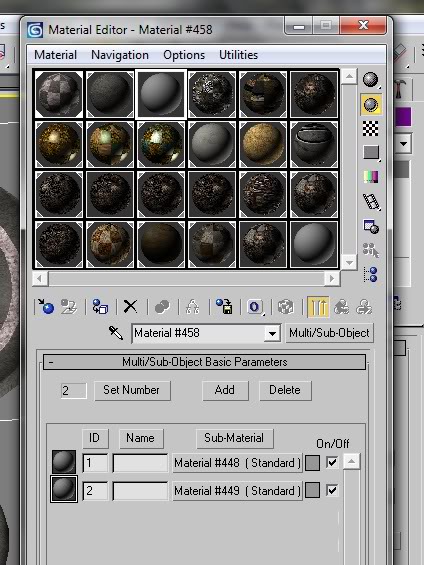
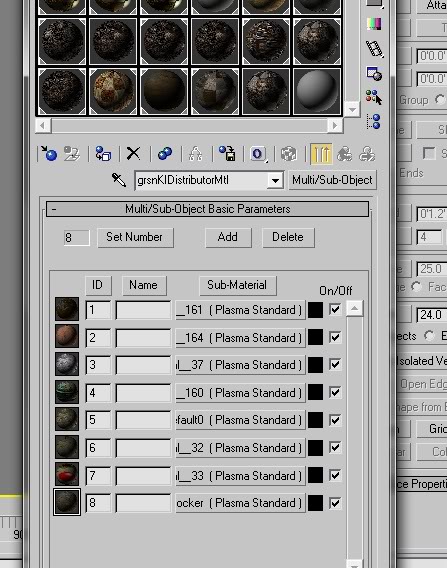
Now as you can see, you have a box that has 10 materials on it!
http://assets.openuru.org/wiki/andy/MaxTutPics1/multisub9.jpg
Don't worry, just click on the "Delete" button until you have only the number of materials you need. In my case it was just 2:
http://assets.openuru.org/wiki/andy/MaxTutPics1/multisub10.jpg
Now where it says "Sub-Material" click on the first button. Remember your paper where you wrote down what Material ID 1 was? right, now you are going to make that happen here. Change this sub-material to Plasma Standard, and apply that texture you decided Material ID 1 was going to be. Repeat this for each sub-material.
In my case, with only 2, I'm done quickly:
http://assets.openuru.org/wiki/andy/MaxTutPics1/multisub11.jpg
Assign this material to your Object. Now it's time to go UV map those textures!
Over in your Modifiers Tab, assign a UVW Unwrap modifier and set to to "Select Faces".
http://assets.openuru.org/wiki/andy/MaxTutPics1/multisub12.jpg
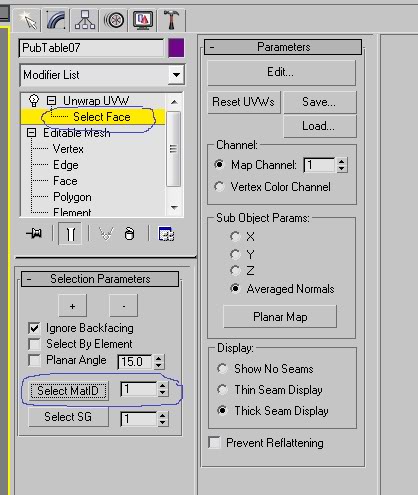
As you look down in the first roll out box, you see where you can "Select Material ID". In my case, I told it to select ID 1. When I do this, it will automatically highlight the faces that I'm going to UV for that material:
http://assets.openuru.org/wiki/andy/MaxTutPics1/multisub13.jpg
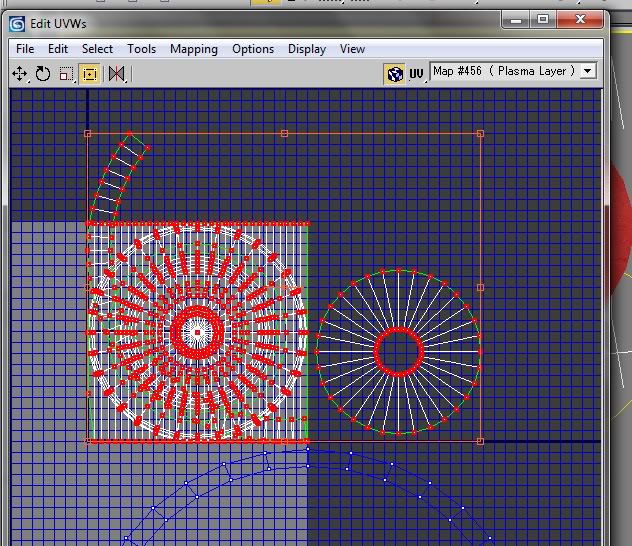
Now you can click on Edit and map the UV's how you want them!
http://assets.openuru.org/wiki/andy/MaxTutPics1/multisub14.jpg
Ready for the next material? No problem! Just go over to your modifier tab, and this time Select the next ID number!
http://assets.openuru.org/wiki/andy/MaxTutPics1/multisub15.jpg
And as you can see, now just the rings are selected.
http://assets.openuru.org/wiki/andy/MaxTutPics1/multisub16.jpg
Once you've mapped out all your material ID's, you're done!
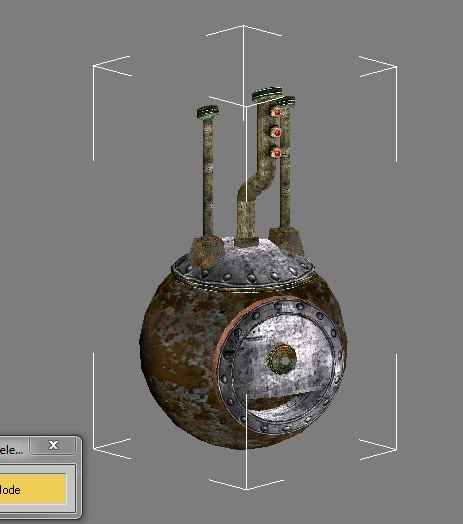
This is great for complex objects, like the KI dispenser! Take a look at it:
http://assets.openuru.org/wiki/andy/MaxTutPics1/multisub17.jpg
It's actually just one single object.......but with 8 materials assigned to it and UV mapped!
http://assets.openuru.org/wiki/andy/MaxTutPics1/multisub18.jpg
Return To: 3DS Max Plugin Tutorials
A copy of the license is included in the section entitled "GNU Free Documentation License".