In Memoriam: Tai'lahr
OpenUru.org, along with the rest of the Mystonline community, is mourning the loss of Tai'lahr on October 16th, 2019.
Rest in Peace, friend.
Vertex Painting
This tutorial covers basic Vertex Painting for 3DS Max and Cyan's Plugin.
Credit for this info goes to GPNMilano.
This tutorial assumes you know the basics of using 3DS Max, and have already setup Cyan's Plugin for use with 3DS Max.
Vertex Painting. What for?
Some of you might ask this. Why paint something when we are already giving an object a nice texture that we created.
Good question. And the answer for some of us is: it makes things easier.
With Vertex Painting you can make part of a texture transparent so that a texture under it shows up in places. You could make a texture that way, but it will be very hard at times to get it UV Mapped correctly on your object. Using Vertex Painting, you can go directly to your object that you've textured, and simply paint where you need it to be transparent for the 2nd texture. A LOT easier.
With Vertex Painting you can put in shadows and lighting effects. Yes, you can do with with actual lights. But there will be times when the lights themselves are not enough, do not give you the correct effect, or incorrect shadows. Once again, by painting on the color of the light, or painting the shadow on in place, you are doing something quickly to make things look nice.
So let's move on to show you how to do this.
Getting Started....
I'm going to assume that you've got an Age already started with objects that you can paint on. The Age also needs to be done enough so that you can export and link in to take a look at your work.
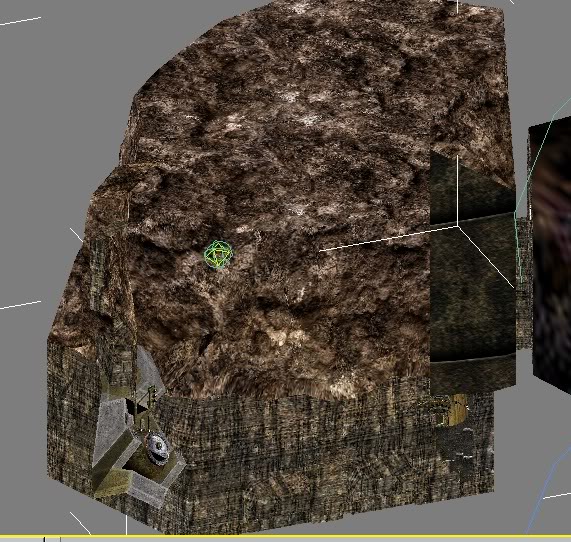
First select the object you wish to paint. In my case here, I have the walls and ceiling of a Rest Room from the Great Shaft:
http://assets.openuru.org/wiki/andy/MaxTutPics1/tutvertexp2.jpg
The problem I have here is: I've got my lighting in, and it's lighting up the walls and floor, plus the avatar quite well. But it's also lighting up the ceiling. I don't want the ceiling lit up like that (and in fact, if you convert the Myst V Descent, and go to one of the Rest Rooms, you see that the ceiling is quite dark). I suppose I could fool around with directional spot lights, adjust their decay range, and many other things. But it's just quicker, and easier to paint the darn thing.
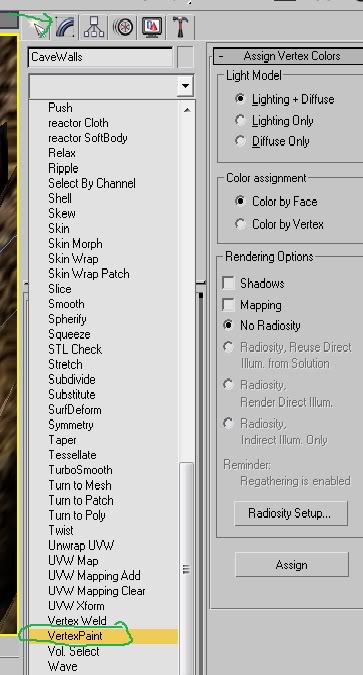
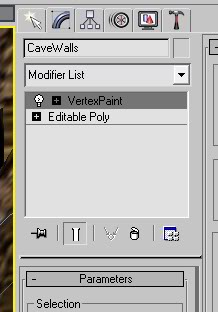
So with the object selected, go over to your Modifications Tab. Click on the drop down box and select VertexPaint, like in my picture below:
http://assets.openuru.org/wiki/andy/MaxTutPics1/tutvertexp1.jpg
Now that you've done that, you'll have roll outs for the Vertex Painting, and you'll have your Vertex Painting Menu Box pop up. Look in my picture below:
http://assets.openuru.org/wiki/andy/MaxTutPics1/tutvertexp3.jpg
In the Channel box, I have a red circle around Vertex Color. If you are going to paint an actual color that you want to be rendered on your object, this is what you select. If you are trying to make part of the texture on an object transparent, you would instead select Vertex Alpha here. Look at the 2nd red circle in my pic. These are the buttons you want to select so that you can see the paint on your object as you paint. The Purple Arrow is where you pick your color you want. The Blue arrow is where you pick how you want to paint: Bucket or Brush. The bucket will paint the whole object uniformly. So you'll more than likely want to use the brush if you are trying to paint shadows. The green arrow is where you set the size of your brush.
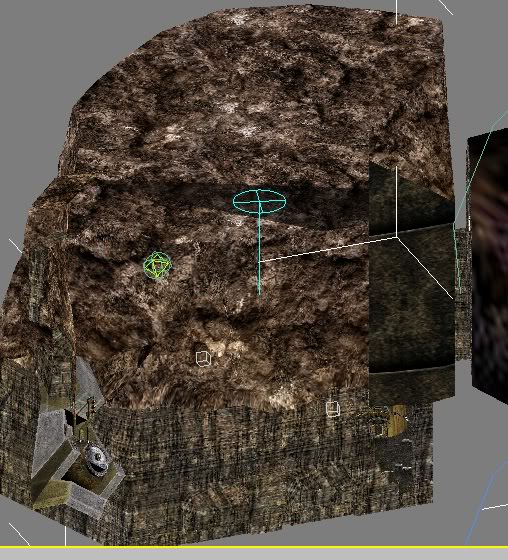
Okay, once you've decided on your color (and if you're painting for Alpha Transparency, you NEED to select Black), you can move your cursor over to your 3D window and start painting. The longer you move your mouse over one area, the more paint will be placed on that area of the object:
http://assets.openuru.org/wiki/andy/MaxTutPics1/tutvertexp4.jpg
Here is my object with everywhere I wanted to paint done:
http://assets.openuru.org/wiki/andy/MaxTutPics1/tutvertexp5.jpg
Now there's a problem. If you try to export right now, you'll get a "Unknown Error" during the export. This is because we need to collapse the modification tree for your object:
http://assets.openuru.org/wiki/andy/MaxTutPics1/tutvertexp6.jpg
To collapse it, simply move your mouse over to the 3D screen with your object selected and right click to bring the pop up menu box:
http://assets.openuru.org/wiki/andy/MaxTutPics1/tutvertexp7.jpg
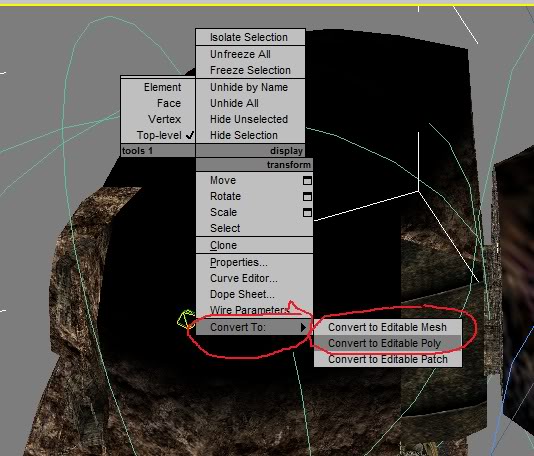
Left click on "Convert To:" and then pick either Editable Mesh or Editable Poly. The modification tree should collapse for you.
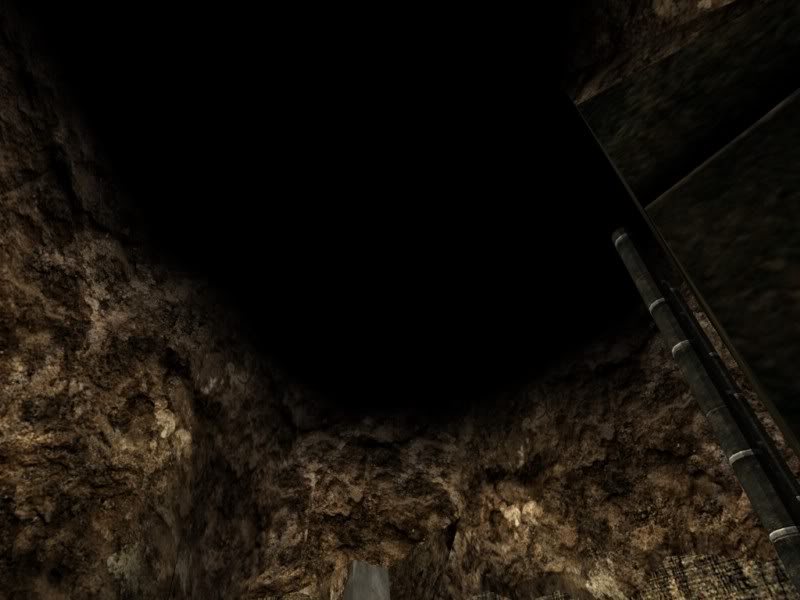
NOW you can export your Age with no errors. Convert it with Drizzle, link in and take a look at your work:
http://assets.openuru.org/wiki/andy/MaxTutPics1/KIimage0109.jpg
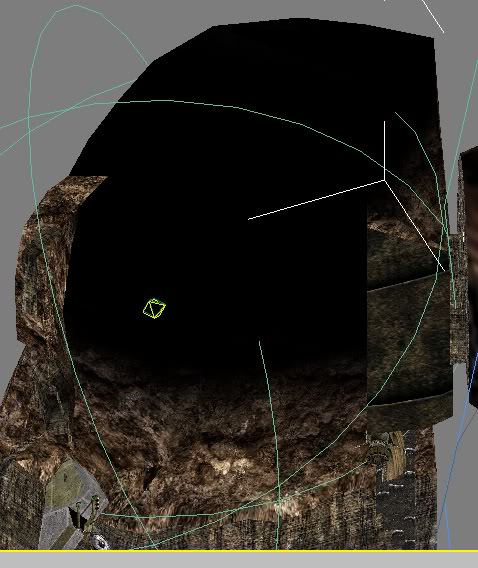
NOTE: The reason my Black shows up as Black is again, I picked "Vertex Color" in the channel box. If I had picked "Vertex Alpha" we would not be seeing the ceiling, but it would be transparent.
Return To: 3DS Max Plugin Tutorials
A copy of the license is included in the section entitled "GNU Free Documentation License".